Using SFC and DISM for system repair
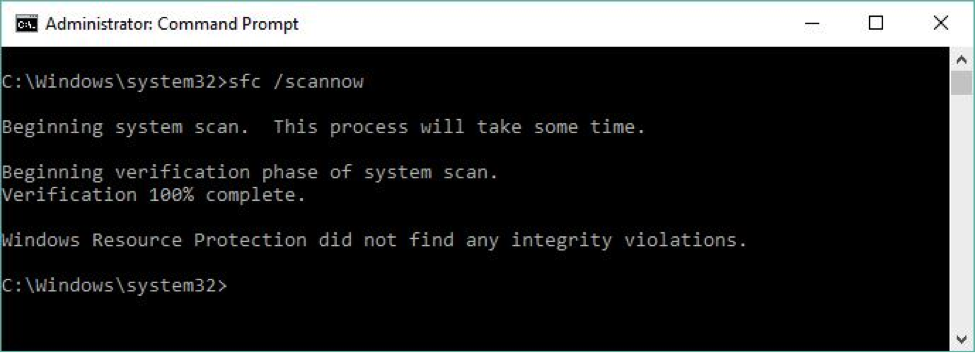
To quote TechNet, the system file checker "scans and verifies versions of all protected system files." It can tell you if it finds anything amiss if you enterSFC /scannow
at the command line. You must run this utility from an Administrator:
Command Prompt (press the Windows key-X combination), and then select
Command Prompt (Admin) from the resulting pop-up menu. This command
takes 5-10 minutes to complete, depending on your PC hardware. This
command also attempts repairs if it finds anything that needs it. Figure
1 shows some sample output.
 Ed Tittel
 SFC determines that a protected file is damaged or changed, it grabs a correct version of the file from the C:\Windows\system32\dllcache
folder and replaces it with a good copy. SFC can even attempt to repair
that file cache if it finds changes or damage there, too. See the
TechNet SFC reference for complete information on this command.
But as repair tools go, SFC is fairly lightweight. DISM is much more powerful and capable. DISM can often fix things that SFC can detect but that it cannot itself fix. DISM supports a raft of capabilities with switches and parameters to match, but basic system file repair syntax is reasonably easy (though it often requires multiple passes before it can set things straight). Here's some sample syntax (consult the TechNet DISM Technical Reference for all the gory details):
dism /online /cleanup-image /checkhealth
dism /online /cleanup-image /restorehealth [/Source: <source-info>]
As with SFC, you must also run DISM in an Administrator: Command Prompt window. The
/checkhealth command simply checks the running image (that's what /online
tells it to do) to see if it can detect any damage or corruption.
Because it's only checking file hashes and signatures, this command
completes in under one minute on most machines. The good thing about /check
is that it not only tells you if it finds damage but if that damage is
repairable or non-repairable. If it's repairable, you can proceed to the
/restorehealth option (covered in the next paragraph); if it's non-repairable, jump to Step 2.
 Ed Tittel
 /restorehealth option.
/restorehealth command can be tricky to use. Because it
can actually repair the Windows image, it needs a source from which to
attempt such repairs. You can omit the /source option, but
if you do the command will try to grab its files from Windows Update
over the Internet. This may or may not work, depending on firewall
settings on your network. A safer bet is to point DISM at a known good
source for Windows image components on the local machine (or on your
local network). This can be a Windows image (.wim) file or a compressed Windows image (.esd,
which is used for electronic software downloads of Windows
installations, as the file extension is meant to communicate). You can
also point to a copy of a WinSXS folder (the usual directory path is C:\Windows\WinSXS) taken from another PC with similar or identical hardware for which dism … /checkhealth returns a clean bill of health.
https://www.computerworld.com/article/3080839/microsoft-windows/your-step-by-step-guide-to-repairing-windows-10.html
No comments:
Post a Comment