HTML, CSS, batch commands, and Javascript examples that I have used in my library work. Short entries, designed as quick reference. By Len Davidson at CUA Law Library
Have patron that needs to connect to VPN outside of campus, want to check if this will go thru our firewall.
To check if PPTP VPN port is open on your PC, use PortQueryUI, a tool used to check the availability of different ports.
1. Download PortQueryUI from Microsoft site: http://download.microsoft.com/download/3/f/4/3f4c6a54-65f0-4164-bdec-a3411ba24d3a/PortQryUI.exe
2. Run it, package will unzip to C:\PortQryUI folder.
3. Go to: C:\PortQryUI and run portqueryui.exe
4. Enter VPN server IP address or hostname, ex. us1.ibvpn.com
5. Select Manually inputquery ports and type 1723 port. Then press Query button.
6. If your result is TCP port 1723 (pptp service): LISTENING then your PPTP VPN port is open and you are able to conenct to our servers.
<script>
 (function () {
  var directionsService = new google.maps.DirectionsService(),
   directionsDisplay = new google.maps.DirectionsRenderer(),
   createMap = function (start) {
    var travel = {
      origin : (start.coords)? new google.maps.LatLng(start.lat, start.lng) : start.address,
      destination :"38.936165,-76.996363",
      travelMode : google.maps.DirectionsTravelMode.DRIVING
      // Exchanging DRIVING to WALKING above can prove quite amusing :-)
     },
     mapOptions = {
      zoom: 10,
      // Default view: lat & lng of center of map, CUA Law School
      center : new google.maps.LatLng(38.936165,-76.996363),
      mapTypeId: google.maps.MapTypeId.ROADMAP
     };
    map = new google.maps.Map(document.getElementById("map-image"), mapOptions);
    directionsDisplay.setMap(map);
    directionsDisplay.setPanel(document.getElementById("map-directions"));
    directionsService.route(travel, function(result, status) {
     if (status === google.maps.DirectionsStatus.OK) {
      directionsDisplay.setDirections(result);
     }
    });
   };
// Check for geolocation support
if (navigator.geolocation) {
navigator.geolocation.getCurrentPosition(function (position) {
// Success!
createMap({
coords : true,
lat : position.coords.latitude,
lng : position.coords.longitude
});
},
function () {
// Gelocation fallback: If can not get location
createMap({
coords : false,
address : "3600 John McCormack Rd., NE Washington DC 20064"
});
}
);
}
else {
// No geolocation fallback: Defaults CUA LAW
createMap({
coords : false,
address : "3600 John McCormack Rd., NE Washington DC 20064"
});
}
})();
</script>
<div id="map-container">
<div id="map-image"> </div>
<div id="map-directions"> </div>
</div>
No matter what device you have, you can take a screen image without rooting your device. But rooting your device offers you some neat tricks — even if you’re using Android 4.0. You can take a screenshot by shaking your device or wirelessly via a web browser.
Take a Screenshot with Android 4.0 (Ice Cream Sandwich)
If you’re using Android 4.0 or later, this is easy. Just press and hold the Volume Down and Power buttons at the same time. You’ll see an animation on the screen, indicating that the screen photo was saved. Android will save the image to your Gallery. Launch the Gallery app and tap Screenshots to view and share your screenshot.
You can take a screenshot on any Android device using Google’s Android SDK. After you’ve set up the Android SDK, all you have to do is connect your Android phone or tablet to your computer with its USB cable and fire up the SDK.
This isn’t the most user-friendly application to set up, but it’s easy to use once you’ve set it up. We’ve got a guide to setting up the SDK and taking screenshots.
AShot is a free, open-source way to take screen images of your Android device from your computer. It requires the Android SDK installed and properly configured. AShot offers a variety of advantages over the Android SDK screenshot feature, including near-real-time streaming of your Android’s screen to the Ashot application on your computer. You won’t have to keep clicking the Refresh button, as in the SDK. For more information, check out our AShot walkthrough.
Manufacturer Shortcuts
Some manufacturers build special screenshot shortcuts into their pre-Android 4.0 devices. For example, on many Samsung Android devices, including the Galaxy Note and Galaxy S II (pre-Ice Cream Sandwich versions), you can press the Home and Power buttons at the same time to take a screen snapshot – in practice, you’ll press and hold the Home button, then quickly press the Power button. On the Galaxy S, press and hold the Back button and the Power button, or try pressing the Back button and double-tapping the Home button.
Different pre-Android 4.0 devices use a variety of different shortcuts – give it a Google and you might find that your device has a built-in screenshot shortcut you don’t know about.
Device-Specific Apps
These manufacturer-specific hooks into the OS allow some apps to provide an easy-to-use, on-device way to take screen image. For example, Samsung Galaxy S, Galaxy Tab, and Galaxy S II (pre-ICS) users can use Screen Capture Shortcut Free to capture a screenshot without rooting their phones.
Another example of a device-specific app is AndroSS, which can take screen images on Android without root access on Tegra devices. If you’re not sure whether a device-specific app exists for your device, search the Google Play Store and see.
Root Apps
The reason you have to jump through the hoops above instead of simply installing a screenshot app is because of Android’s security model. Android doesn’t allow apps to view your device’s screen – this could be a security problem. For example, a malicious app could spy on your online banking sessions. There’s no permission apps can request to take snapshots of your screen.
To give an app permission to view your screen, you’ll need to root your Android. After rooting your Android, you can install one of the many screen snapshot applications that require root from Google Play. There are many options to choose from, although many of them are paid apps. aScreenshot is a free app that worked for me. You can take a screenshot in a variety of ways, including shaking your device, tapping a notification, or setting a delay. Other apps have similar features. AirDroid, an awesome free app we’ve covered in the directory, also supports taking a screen shot on rooted devices. You can capture those images wirelessly via your web browser. AirDroid can control many other aspects of your device from a browser, too.
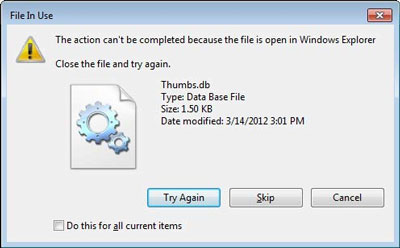
Error “The action can’t be completed because the
folder or a file in it is open in another program. Close the file or
folder and try again” and it mentions Thumbs.db
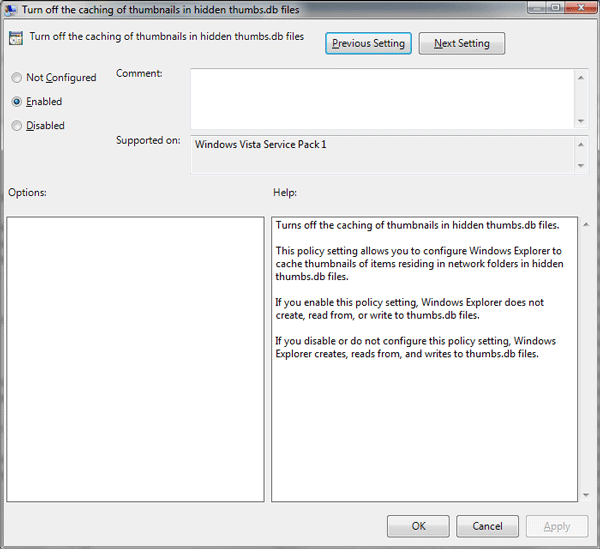
To fix this, disable the caching of thumbnails in hidden thumbs.db files via the Group Policy Editor as below:
Run gpedit.msc
Navigate to: User Configuration\Administrative Templates\Windows Components\Windows Explorer
Set “Turn off the caching of thumbnails in hidden thumbs.db files” to Enable.
You may need to log off or force group policy to update before this takes effect, I am not sure.
To force group policy to update, run gpudate /force
Or see the following Microsoft KB article
which contains a Fix It to do this for you (and instructions on how to
do it via the registry if you have a version of Windows 7 without the
Group Policy Editor).
Sometimes you want to number the items in your report. For instance, in the Sales by product report, you might want "1" to precede the first item in a product group, "2" to precede the second item, and so on. When the next product group begins, the counting starts over, and "1" precedes the first item. I discussed a technique for doing this in the "Summing in reports" article, in the section Tip: Numbering the rows. Because it's a common request related to counting in reports, I'll also revisit it briefly here.
You can number the items in your report by using a calculated control and the RunningSum property. First, you create a text box and set its ControlSource property to =1.
Then, you set the RunningSum property for the text box. If you want the numbering to start over for each group, set the property to Over Group. If you want to accumulate a running sum for the entire report, set the property to Over All. For more information about running sums and the RunningSum property, see the section Calculating running sums (cumulative totals), in the "Summing in reports" article.
The expression sets the value of the text box control to "1". Because the RunningSum property is used to accumulate the value, the value in the text box is increased by one for every row. The Sales by Product with Running Sum and Numbered Rows report, in the sample database, demonstrates this technique. Entering a period (.) in the Format property box appends a period to the end of the number.
For detailed step-by-step instructions for numbering the items, see the following expandable section:
In the Database window, under Objects, click Reports.
Click the report, and then click Design in the Database window.
To create the text box control
In the Detail section, click where you want the number to appear.
In the Toolbox, click the Text Box tool.
Note If the Toolbox is not visible, on the View menu, click Toolbox.
In the Detail section of the report, drag the pointer to create a text box, making sure that it's wide enough to accommodate the largest item number. For example, if you will likely have one hundred orders, you will need space for at least three characters (100). If a label appears next to the text box, delete the label.
Select the text box, and then click Properties on the View menu.
Click the All tab, and then type txtItemNumber in the Name property box.
Click the Data tab, and then select Over Group in the Running Sum property box.
Type =1 in the Control Source property box.
Click the Format tab, and then type #. in the Format property box.
Close the property sheet.
On the File menu, click Save and then close the report.


 Step-by-step: How to number the items in a report