There are two methods you can use to remove files from an infected
drive. However, all of them involve cleaning the drive first before you
begin copying files from the infection source onto a clean drive.
- Use an antivirus boot disk to scan and clean the drive before removing
- Remove the drive and attach to a second machine for cleaning and copying
You don’t want to start messing around with a malware infection,
or worse, ransomware. You could, in theory, just start copying
non-operating system files to a clean disk. However, as malware can
attack and hide in a vast range of locations, why take the risk of
reinfection after going through the effort of copying everything over?
1. Use an Antivirus Boot Disk to Clean Your Drive
An
antivirus boot disk is a complete antivirus package that comes in the
form of a Live CD/USB. A Live CD/USB is an environment you can boot into
without using the host operating system. For instance, your infected
machine might run Windows 10, but the antivirus boot disk doesn’t
interact with Windows 10 in any way.
As the antivirus boot disk
doesn’t interact with Windows or any other host operating system, it
doesn’t trigger any malicious files. Whereas if you attempt to run an
antivirus or antimalware suite from within the infected operating
system, there is a chance the malware will fight back.
Download and Create Bitdefender Rescue
First
up, you need to download and create the bootable antivirus disk on a
known clean system. You cannot complete this process on the infected
machine as it could corrupt the process. I’m using Bitdefender Rescue CD
for this example.
Download:
Bitdefender Rescue CD (ISO)
Next,
you need to burn the rescue disc to a USB or CD. I’m going with a USB
as that is what I have to hand, and I’ll use UNetbootin to burn the ISO
to the USB.
Download: UNetbootin for
Windows |
macOS |
Linux
Now:
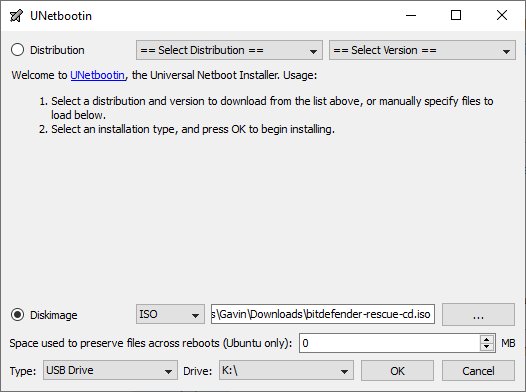
- Fire up UNetbootin and insert the USB drive. Please note this
process will completely wipe your USB flash drive, so back up any
important data before proceeding.
- Select Diskimage, then browse to the Bitdefender Rescue ISO
- Select the USB flash drive you want to use, then press OK.
How to Scan and Clean Using Bitdefender Rescue
Once
the process completes, insert the Bitdefender Rescue USB in the
infected system. After you switch it on, press F11 or F12 to enter the
boot menu. (The boot menu keys vary by machine.) Use the arrow key to
select the USB drive and boot into the Bitdefender Rescue drive.
Select
Start the Bitdefender Rescue CD in English and press
Enter.
You need to agree to the EULA. After agreeing, Bitdefender will
automatically update, then begin scanning any local drives it finds. The
Bitdefender scan automatically quarantines and removes malicious files.
At
this point, I would run the scan again to make sure nothing flew under
the radar. After your scan confirms the drives you scan are clean, you
can copy them onto another machine.
Other Linux Live Rescue Disks
A
Linux Live USB/CD is very similar to the antivirus rescue disc. You are
booting into an environment outside of your regular operating system,
but you can still interact with your local files and folders. In this
case, you can scan your local files before extracting them to a clean
external system.
2. Remove the Drive for Cleaning
The second
and less advisable option is to remove the drive from the infected
system. Once removed, you can connect the drive to an alternative system
to scan. In theory, so long as you have a strong antivirus or
antimalware suite installed on the second machine and, most importantly,
you don’t interact with or execute any file on the removed infected
drive, you can scan it without causing an issue.
There are a few things you need to make this approach work.
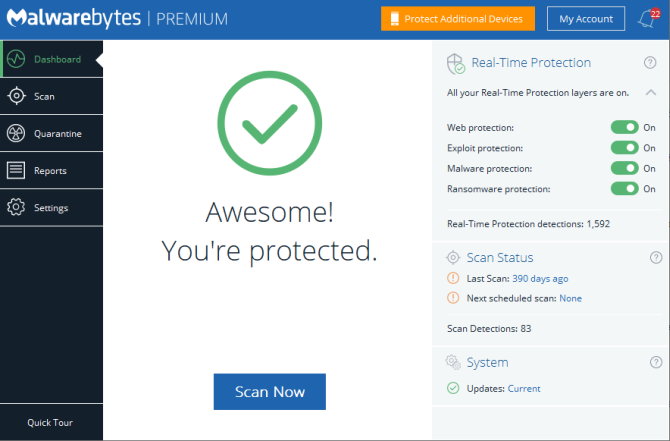
Antivirus or Antimalware
Sandbox
Next,
I would also advise using a sandbox tool during the data transfer
process. A sandbox creates a temporary environment within your operating
system. If there is an issue with the data transfer, such as malware
sparking into life, you can close the sandbox to remove everything
inside. For that,
Shadow Defender is an excellent option.
You
can use Shadow Defender free for 30 days, which is ideal if you only
have one system to transfer data from. Otherwise, a lifetime license
will set you back around $35.
The idea with Shadow Defender is
that you turn it on, creating a virtual restore point. From that moment,
you can safely play with anything on your system because once you
restart your system, Shadow Defender will wipe any system changes. In
the event you trigger malware on the infected drive, the combination of
antivirus/antimalware and reboot to restore sandbox tool will keep you
safe.
There Shadow Defender alternatives available for both macOS and Linux:
Network Connection
The final thing to remember is to
disconnect the clean machine from the internet before copying or
scanning the malicious files. Any malware requiring a network connection
will cease to function. However, before disconnecting from the
internet, ensure you have up-to-date virus definitions, ready to capture
any malicious activity.
Infected System Clean Checklist
So, to recap, you need to:
- Download, install and update an antimalware suite
- Download, install and update a sandbox tool
- Unplug your system from the network
Then you can plug in your potentially infected external drive, scan it, clean it, and hopefully free yourself from malware.
Keeping Your System Clean
The
most difficult thing with a malware infection is understanding if the
system is truly clean. You can scan a system with multiple antivirus and
antimalware tools, and they still might miss something. I’m not trying
to worry you. It is the truth of the matter.
Thankfully, most of
us “only” run into common forms of malware. You should keep your eyes
peeled for phishing attempts and other drive-by malware attacks, but
these are all generic malware types. For the most part, only high-value
targets need to worry about targeted malware attacks.
 menu and select Settings.